Straight to the point, in this tutorial we'll learn how to install SSH on Ubuntu to securely access it from a local computer.
You can basically break down SSH in two parts, server and client. The client part is already installed in Ubuntu, and there's nothing special about it.
So, here we'll install and configure the server part. If you're running with Ubuntu server, not the regular desktop Ubunu, then there's a good chance that SSH server is already installed.
Contents
Install SSH Ubuntu
To install the ubuntu ssh server , follow the steps below one by one.
- Update the apt software repository.
sudo apt update
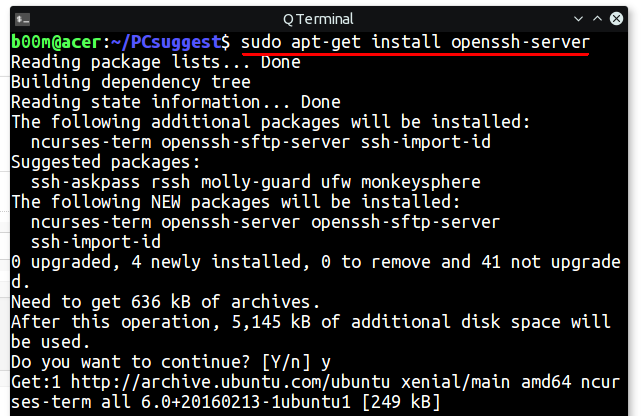
- Then install the openssh-server package.
sudo apt install -y openssh-server

- Start the SSH service, if not started already.
sudo systemctl start ssh.service
- Check the SSH service status, to verify.

sudo systemctl status ssh.service
- To temporarily disable SSH on Ubuntu, use-
sudo systemctl stop ssh.service
- To permanently disable ssh server from startup, use-
sudo systemctl disable ssh.service
- If you re-enable SSH server at startup,
sudo systemctl enable ssh.service
That's all, the above commands will install ubuntu ssh server along with it's dependencies.
The installation process will also create it's own set of SSH public and private keys under the /etc/ssh/ directory.
Most probably you don't need to use the default keys. If you want to setup password less ssh login, using previously generated keys is better.
Ubuntu SSH server configuration
If you want to modify the fefault configuration according to your need, you can follow guide below.
The default system wide configuration directory is /etc/ssh/ and ~/.ssh is the user specific configuration directory.
You can have your special user specific ssh setting in the ~/.ssh/config file.

And before editing the the configuration, make sure the SSH service is allowed by the ufw firewall, assuming that you're using the default port 22 for ssh.
sudo ufw allow 22
Also assuming that ufw is installed on your system, as it comes pre-installed with Ubuntu.
Let's start editing, first take a backup of the original ssh config file.
sudo cp /etc/ssh/sshd_config /etc/ssh/sshd_config.bac
Then start editing the ssh server config file.
sudo nano /etc/ssh/sshd_config
A sample SSH server configuration below.
Port 52222
Protocol 2
HostKey /etc/ssh/ssh_host_rsa_key
HostKey /etc/ssh/ssh_host_dsa_key
HostKey /etc/ssh/ssh_host_ecdsa_key
HostKey /etc/ssh/ssh_host_ed25519_key
UsePrivilegeSeparation yes
KeyRegenerationInterval 3600
ServerKeyBits 1024
SyslogFacility AUTH
LogLevel INFO
LoginGraceTime 120
PermitRootLogin prohibit-password
StrictModes yes
RSAAuthentication yes
PubkeyAuthentication yes
IgnoreRhosts yes
RhostsRSAAuthentication no
HostbasedAuthentication no
PermitEmptyPasswords no
ChallengeResponseAuthentication no
X11Forwarding yes
X11DisplayOffset 10
PrintMotd no
PrintLastLog yes
TCPKeepAlive yes
AcceptEnv LANG LC_*
Subsystem sftp /usr/lib/openssh/sftp-server
UsePAM yes
ClientAliveInterval 60
ClientAliveCountMax 300
In the above configuration, I've changed the default port to 52222, and the last two lines to keep the SSH connection active in absence of user activity.
You need to restart the SSH server after changing the configuration.
sudo systemctl restart sshd.service
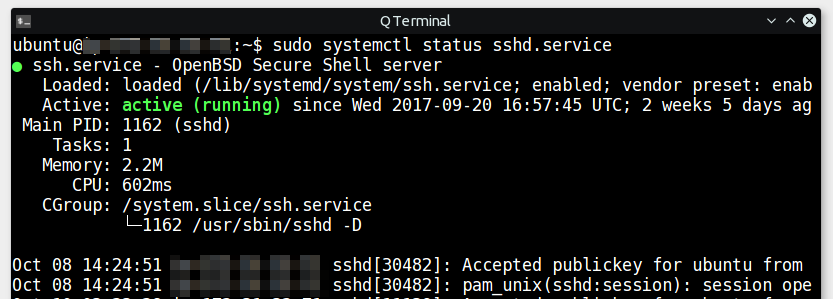
Check the ssh server status with the sudo systemctl status sshd.service command.
Note: If you have changed the default SSH port number, then you need to use the -p option with SSH to login.
ssh -p 52222 192.168.1.1
Conclusion
That's pretty basic way to install SSH on ubuntu. The first thing you might want to consider is passwordless ssh setup and set a long enough user password.
I'll also recommend to entirely disable password based login if your ubuntu server has a public facing IP address with SSH port visible.
Also, if you're using a VPS server and IPv6 is not required for normal networking functions, it's better to disable ipv6 , for a little more security and avoid failed SSH login attempts.
So, that's all for today, I'll discus about hardening the ssh server security in another tutorial, stay tuned.
Thanks, when other instructions failed, yours came through with flying colors! In others way too many gaps were left open and caused failure of the ssh to work! It's nice that some of these ARE actually tested and found to be operational!! Well done!