Here in this tutorial, we'll discuss how to easily disable IPv6 on Windows 10.
With IPv6, we have the capability to assign a unique IP address to every internet connected device. However, sometimes improper IPv6 configuration leads to complication and security issue.
As an example, while using a VPN service on Windows, I ran into an issue, lack of proper IPv6 support and unavailability of IPv6 capable OpenVPN servers. So, I had to disable IPv6 to avoid IPv6 leak and other complications.
Without further ado, let's jump into the main topic.
Contents
Disable Ipv6 on Windows 10 from Network and Internet settings
There's various method available on Windows to disable IPv6. The easiest of them, to open the Network and sharing center and change the adapter settings.
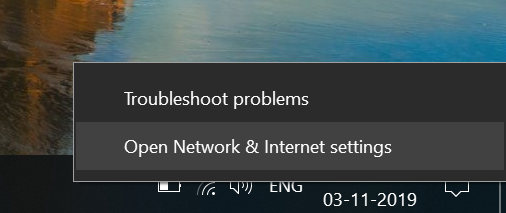
To disable ipv6 on Windows 10, right-click on the network icon and select Open Network and Internet Settings option.
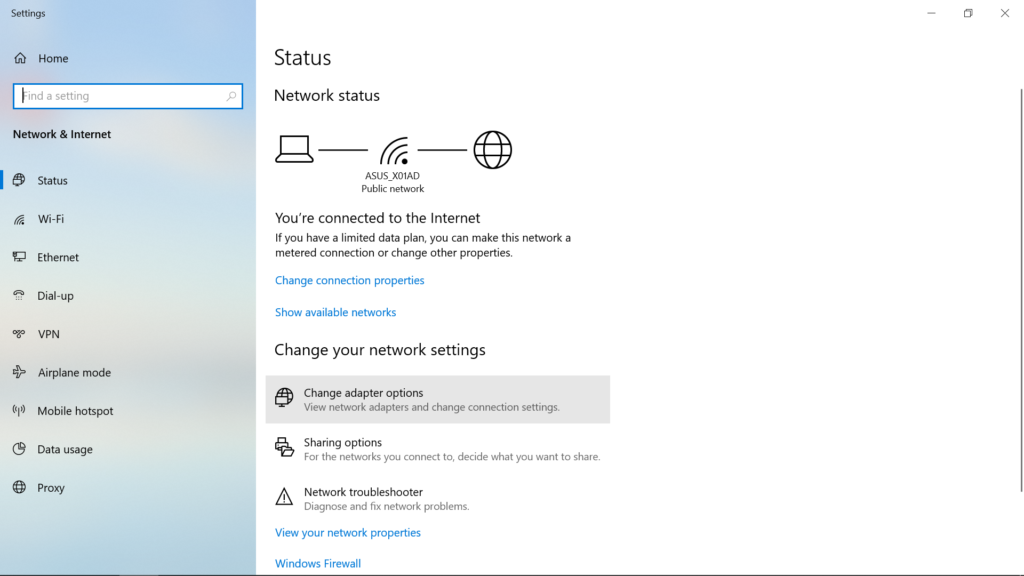
Then select the Change adapter options from this settings window, screenshot attached below.
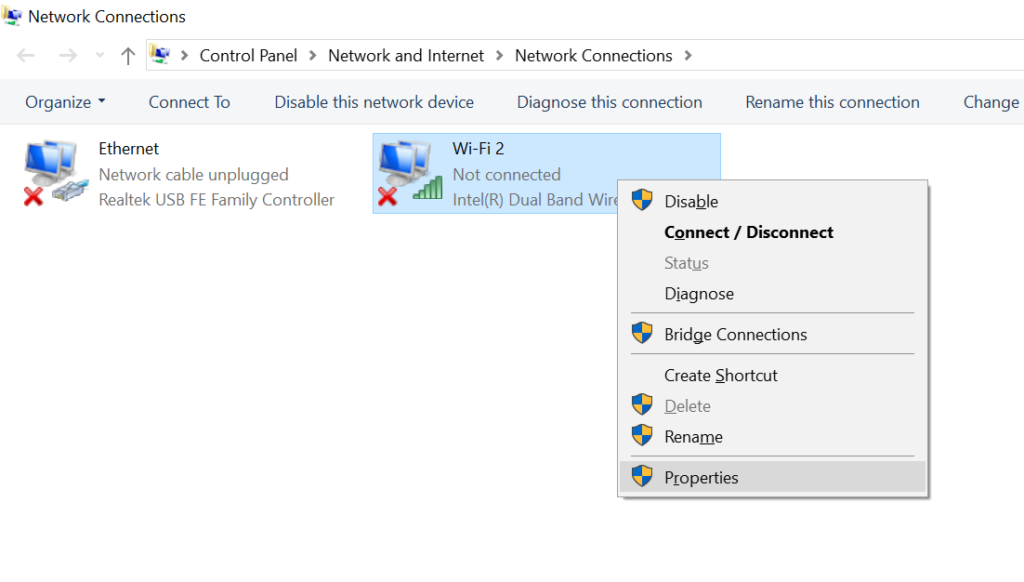
After select that, the network connection settings will appear, here you've to select individual adapters and right click over them to get the properties option.
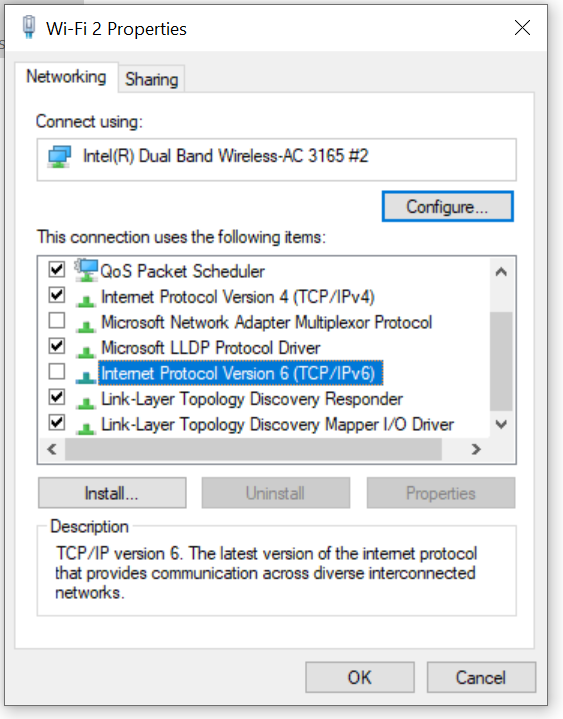
From the properties option, scroll down to find the Internet Protocol Version 6 (TCP/IPv6) check box. Now uncheck this tick box and hit the OK button at the bottom.
Finally, disconnect the network connection if it's connected, and re-connect if required. That's all you need to do to disable IPv6 on Windows.

To re-enable, you just have to revert the previously made changes. Follow the same process, but this time, tick the Ipv6 check box and hit OK to enable ipv6.
Disable IPv6 on Windows using PowerShell
To disable IPv6 on Windows using the command line, You can use the PoweShell commands.
First open up Windows PowerShell as administrator and use the Get-NetAdapter command to get all available network interfaces.
Note:- PowerShell commands are case-insensitive, you can type either in lowercase or upper case or mix both, but it's recommended to stick with proper commands.
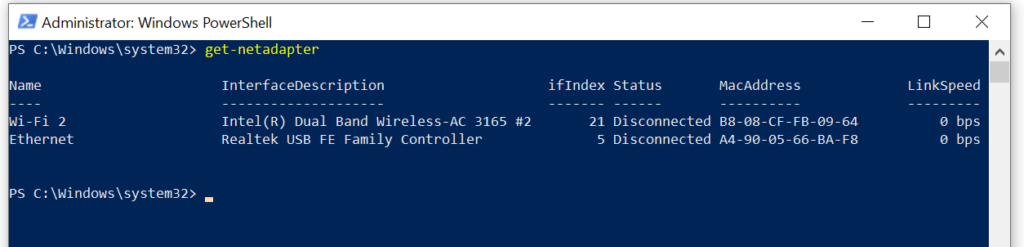
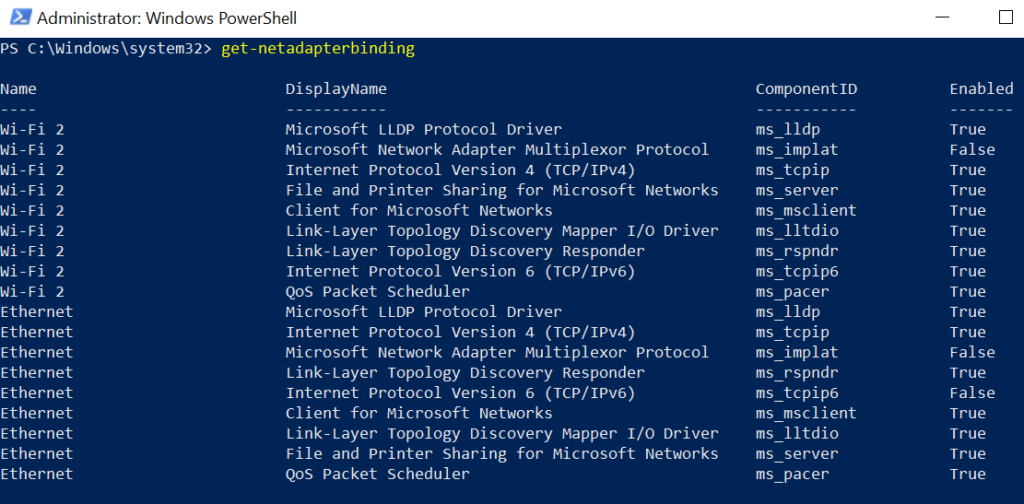
So, here you have an overview of all the available network interfaces. To get more details and IP binding to all the available interfaces, use the Get-NetAdapterBinding binding command.
After recognizing the desired networking adapter interface and IP binding, use the Disable-NetAdapterBinding command to disable the particular type of binding, either IPv4 or IPv6, is this case we will only disable ipv6 on Windows 10.
As an example, I want to deactivate IPv6 on the Wi-Fi 2 interface. For that, I've to use the PowerShell command listed below.
Disable-NetAdapterBinding -name 'Wi-Fi 2' -ComponentID ms_tcpip6 -PassThru

You can use the wildcard * with PowerShell to disable ipv6 on all adapters, instead of the disabling them one by one.

To re-enable IPv6 on all the interfaces, you've to use the Enable-NetAdapterBinding command, an example below.
Enable-NetAdapterBinding -name * -ComponentID ms_tcpip6 -PassThru

Conclusion
Obviously, it's not a good idea to block ipv6 connections for no reason. The reason I had to deactivate IPv6 is few problems with IPv4 only VPN and proxies.
So, it's fairly easy to disable IPv6 on Windows using these two methods mentioned above. Hope this quick tutorial is helpful, if you've any suggestion or question, just drop a comment below.
Leave a Reply