If you're looking for how to install NVIDIA drivers on Ubuntu easily, it's here. Simply follow the steps below one by one.
- Add the graphics drivers PPA
- Uninstall the old drivers, if any
- Install ubuntu nvidia drivers
- Reboot the PC
- Check if NVIDIA card is working properly or not
This tutorial is for desktops only, so if you have a laptop with Optimus GPU, check this tutorial about NVIDIA Optimus on Ubuntu.
It's not like you always need to install the propitiatory ubuntu nvidia drivers. The default open source driver, nouveau is quite efficient now.
However if you want use the NVIDIA GPU for CUDA and some other purpose, then you definitely need the non-free drivers.
Contents
1. Add the Ubuntu graphics-drivers PPA
Ubuntu's default restricted repository also have the NVIDIA drivers, but this PPA provides the latest drivers with proper patches.
The graphics-drivers PPA also provides patched bumblebee, VDPAU and vulcan graphics API.
Adding the PPA is fairly simple, and you need to update the apt software repository after adding it.
sudo add-apt-repository ppa:graphics-drivers
sudo apt-get update
2. Uninstall the old drivers if any
If you've installed any propitiatory ubuntu nvidia driver previously, uninstall them to avoid possible driver conflicts.
You can verify this with the lspci command. And most probably your NVIDIA card is connected to the first PCIe x16 port, you can use this command below.
lspci -k -s 01:00.00
Check the output, the Kernel driver in use: options should be either nouveau or nvidia. The meaning is obvious, if the kernel driver is nouveau, then it's using the open source driver, if it's nvidia, then the propitiatory driver is in use.

So, if you think your system is using the NVIDIA drivers, then uninstall them.
sudo apt-get purge nvidia-*
sudo apt-get autoremove --purge
Note: If the above lspci command returns a blank or irrelevant output, then you need to run the lspci -k command, and check the output manually line by line.
3. Install ubuntu NVIDIA drivers
To install nvidia drivers on Ubuntu, you can either use the command line or the Additional Drivers GUI tools.
Here we will be using the command line, as it allows to see what's going behind the scene.
sudo apt-get install nvidia-378 nvidia-settings
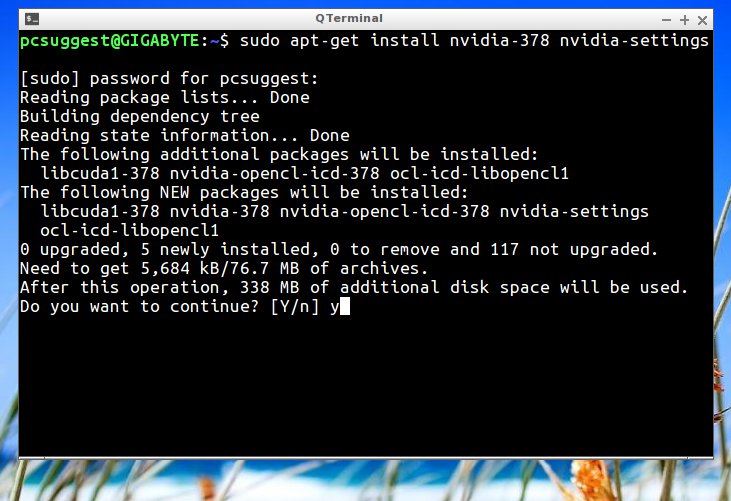
Note: All nvidia drivers may not work as expected. While writing this tutorial, the driver version 384 and 378 was working best for me. You may have to find out the best driver for your system through trial and error.
Don't forget to check the latest driver version while installing on your system. Just type sudo apt-get install nvidia-and keep tapping the Tab key, it will print the available driver versions.
However you can install just the driver and nvidia-settings, use the --no-install-recommends flag along with apt-get, the nvidia driver was around 74.2 MB.
The installation will take some time to download and compile, around 5 -10 minute.
4. Reboot the system
Now you need to reboot the system to take the changes effect.
Note: In case you're facing a black screen or low GPU performance after rebooting, you can fix it like below.
In this case, start a virtual TTY by pressing the Alt + Ctrl + F1 key combo and uninstall the NVIDIA drivers.
- First try with running
/usr/lib/nvidia-378/bin/nvidia-xconfigand rebooting again. - If the previous trick didn't worked, then run
sudo apt-get purge nvidia-* && sudo reboot
However such case is rare, happens only if NVIDIA drivers and X11 configuration were not configured properly.
5. Check if NVIDIA card is working properly or not
After rebooting and successfully logging in to the system, your system should be using the nvidia kernel module, check that with lsmod command.
lsmod | grep -i nvidia
If there's no output, then it must be using the nouveau driver, check that with lsmod | grep -i nouveau command.
And if the system is using nouveau, then you need to repeat the process from step 2.
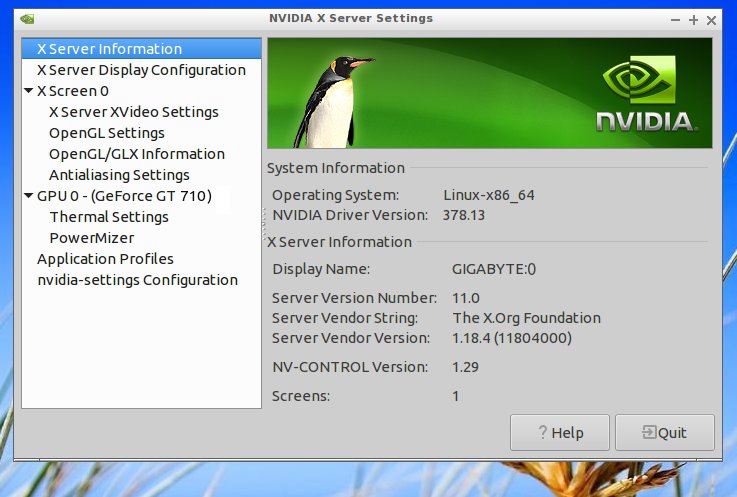
Finally it's time to check the NVIDIA graphics, you should be able to run the NVIDIA X Server Settings application successfully.
nvidia-settings
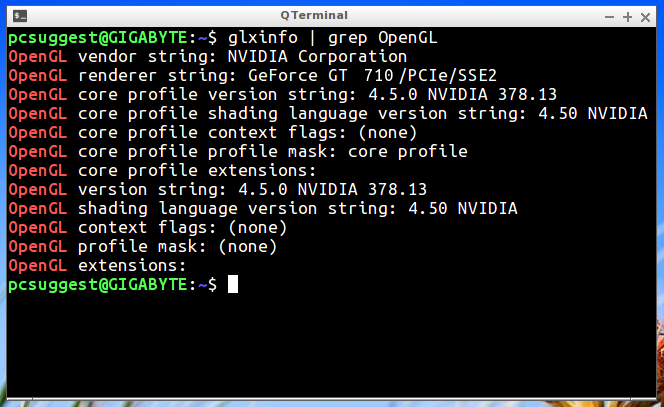
You can also run the glxinfo application to check the OpenGL version and related ubuntu nvidia driver version.
glxinfo | grep OpenGL
Or you can filter out the results even more like below. It should return some text that contains your NVIDIA graphics card version.
glxinfo | grep -i 'opengl renderer'
So, that's all you need to install nvidia driver ubuntu, hope it's simple enough to implement.
This tutorial is tested on Ubuntu 17.04 and Ubuntu 16.04.3, but also valid for Linux mint and other Ubuntu based distros.
Awesome! This is the simplest procedure I've seen and it worked perfectly the first time. Thank you!
I couldn't get past the login screen at boot time. this worked for me - many thanks.
Super is the best way to install NVIDIA drivers thank you